As we continue getting started, and as you continue working in and becoming more familiar with your account, you’ll see that you have a lot of customization options. For now, we’ll just stick to the basics.
- Step 1: Set Up Your Account for Success
- Step 2: Put Tap Inspect Jobs to Work for You
- Step 3: Record Your Inspection Observations
- Step 4: Review and Share Your Results
In this step, you’ll learn about the tools you have available to record your inspection observations in Tap Inspect.
Recording Inspection Observations in Tap Inspect
Tap the Inspect tab of the Demo Dan job to get started with recording inspection observatons. Inspection observations are recorded in reports.

A job can have one or more reports. This can be handy when you are providing more than one service for the job.
You can expand and collapse a report by tapping the name of the report on the Inspect tab. Home Inspection is the name of this job's report.
Tap Inspect has a few powerful tools to help you record your inspection observations in a report.
- The report checklist helps you stay on track and record the same information on every inspection you do. This helps you identify and describe all the things required by most Standards of Practice.
- Comments let you describe what is unusual about this specific property and help guide your client on what you recommend to do next. Comments go deeper and are more specific than your checklist.
- Photos clarify your comments and can often show much more information about an item than text can describe.
Tap Inspect guides you when using all three of these tools while recording your observations to help write your reports while you are doing the inspection.
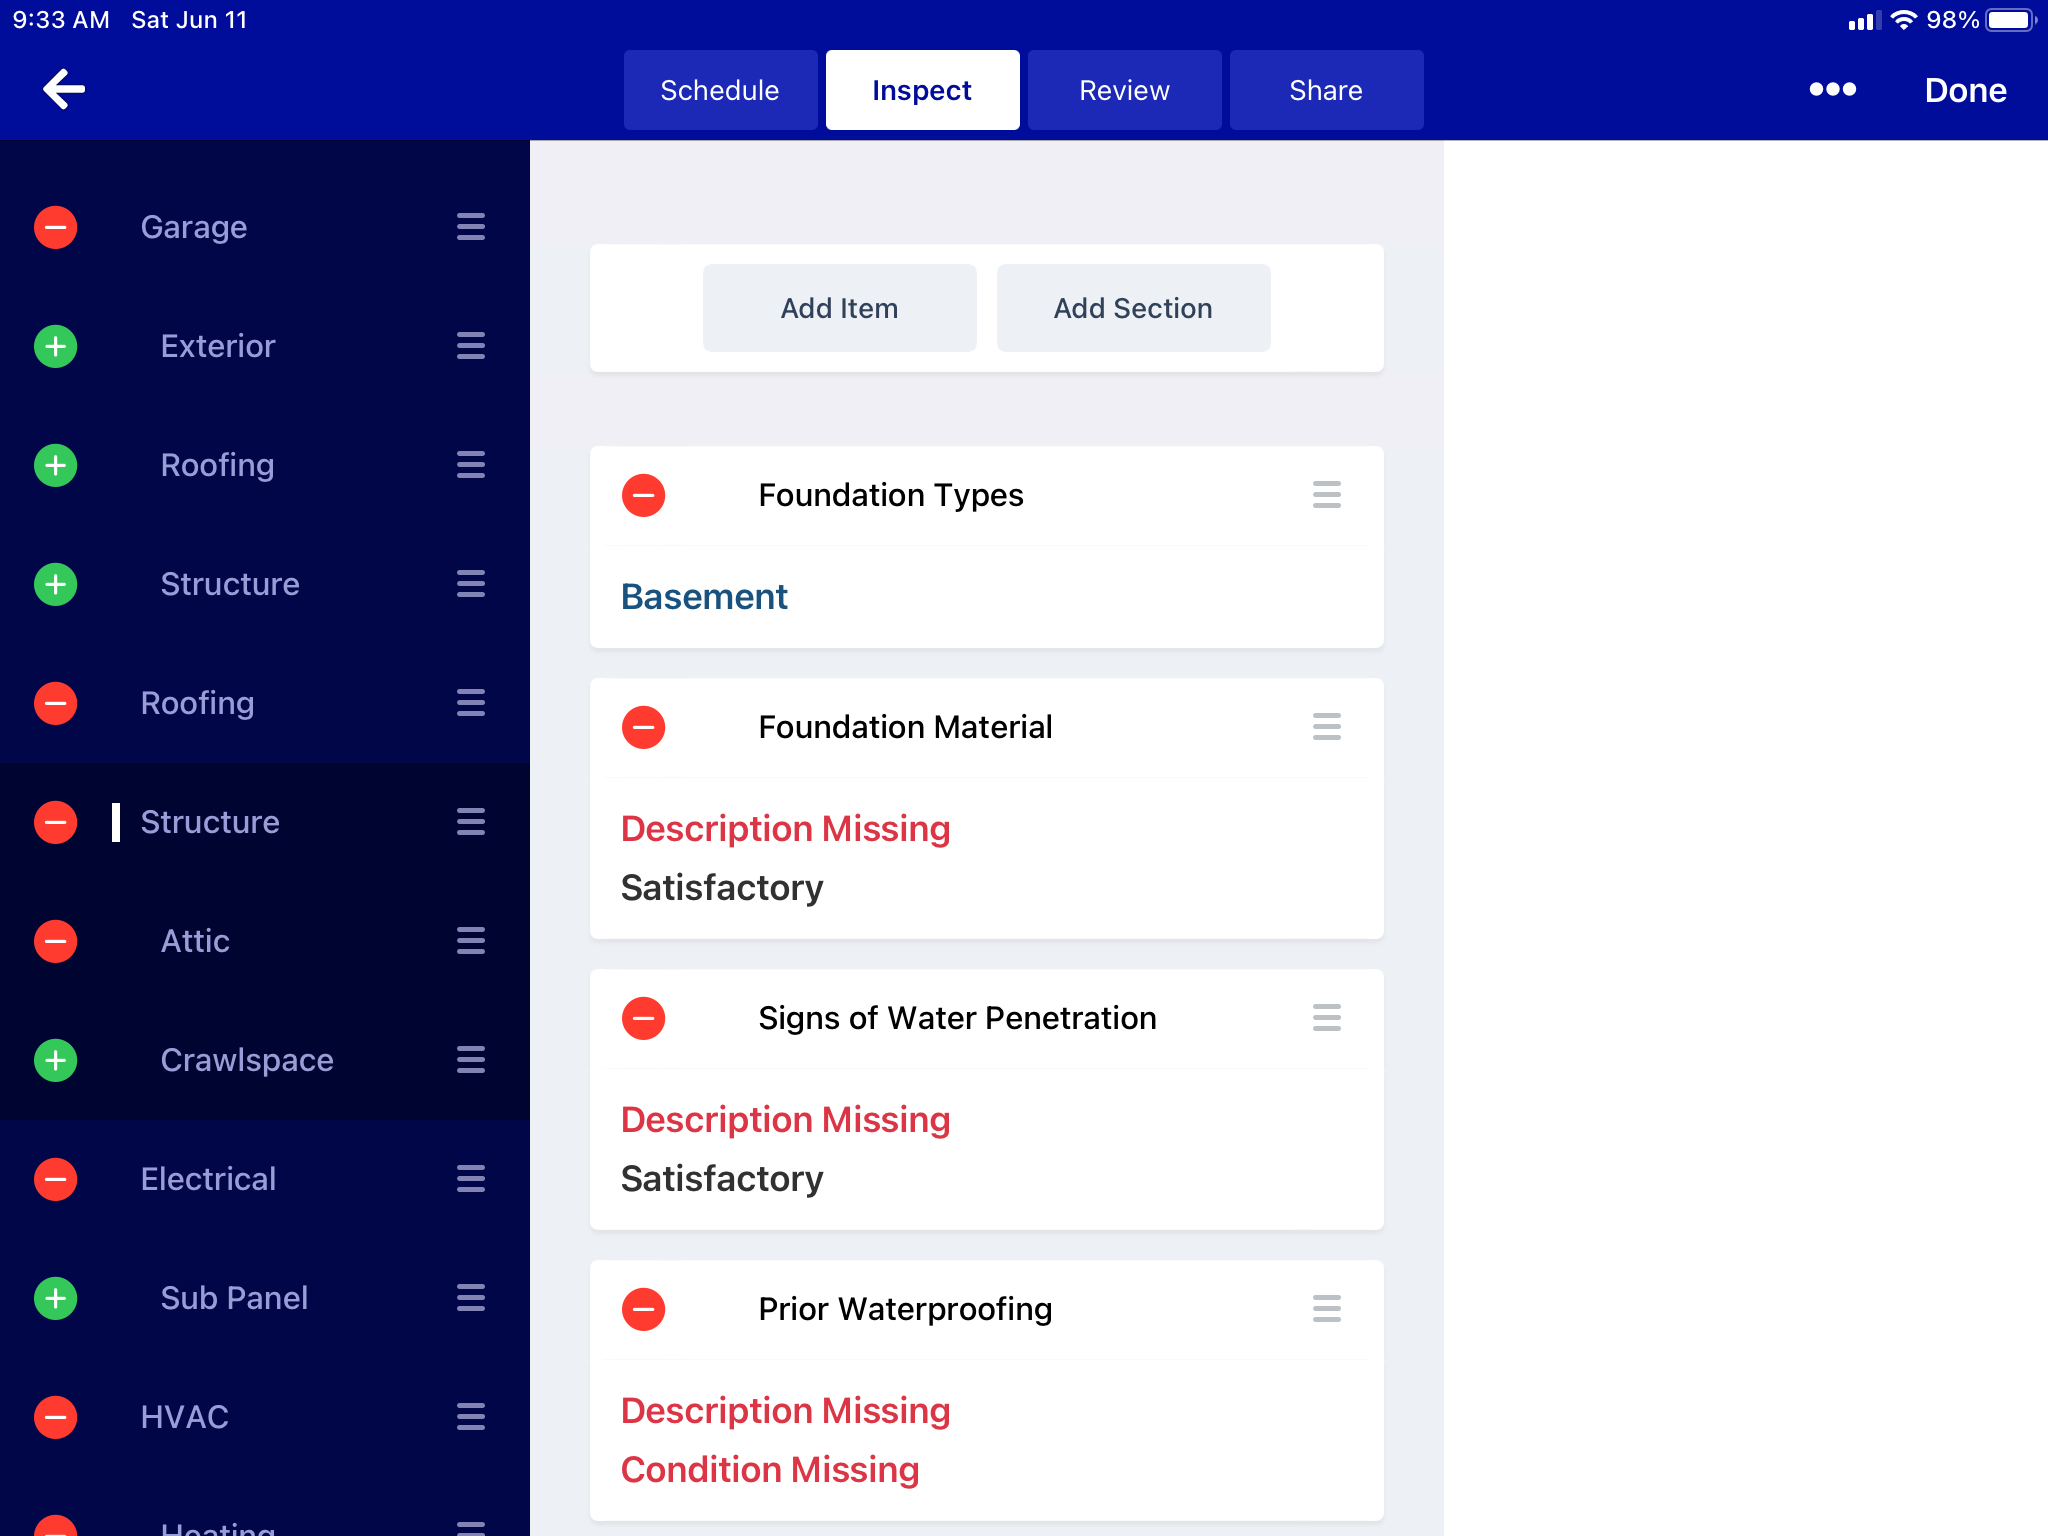
The Report Checklist
Each new report is created from a template and you are given a new blank report checklist. The checklist is organized in a hierarchy to make navigation and reading easier for you and your client.
Recording your observations is as simple as going into each item and recording what best describes that item.
The number in the red circle next to each section indicates how many items still need to be completed in that section. It will decrease as you complete recording information in each item until the red circle goes away This lets you know you have recorded observations into each item of the Section.
Notice that the Structure section of your Demo Dan report has 3 incomplete items. Tap Structure, and you can tell which items still need observations recorded by looking for the red text describing what is missing.
Show and Hide Sections and Items
One very important skill to learn when using tap expect is that you have the ability to show hidden sections and items and also to hide unneeded sections and items so they are not displayed in a specific report for a specific property. You can also duplicate sections and items if you need another for a specific property.
In the Demo Dan report, tap Edit in the top right corner of the screen to enter the Edit Mode of your report and you will see the report checklist change. There are now red circles with a minus and green circles with a plus displayed next to each section and item of your report checklist. Tap Done to return back to the Data Entry mode of your report.
Tapping a red minus next to any section or item lets you hide that element in this report. This can be very handy if you do not have that element present at this property. For example, if this property does not have a Garage you can hide the entire Garage section so it is not displayed to the reader.
You can also tap the green circle to show a Hidden Section or Item for a specific property. For example, if you have more than three bathrooms you can tap the green plus sign next to bathroom number four and it will be visible in this report.
Let me offer a word of caution. When you are in edit mode of your report you will also see a Delete button in several places. Deleting a section or item is NOT the same as hiding it. You can not un-delete sections, items, or options. When a checklist element is deleted it is gone forever and can not be recovered.
As a best practice, you only want to hide things you do not immediately need. That way they can always be added back if you need them later.
Use Comments to Tell the Story
The report checklist is great to keep you on track but comments or where you really communicate with a reader of your reports. The checklist is great to record specific bits of information but comments let you put your observation into perspective.
Your Demo Dan report has quite a few comments already added so you can see how the may work for you. You can edit any existing comment by tapping on it to open the comment editor.
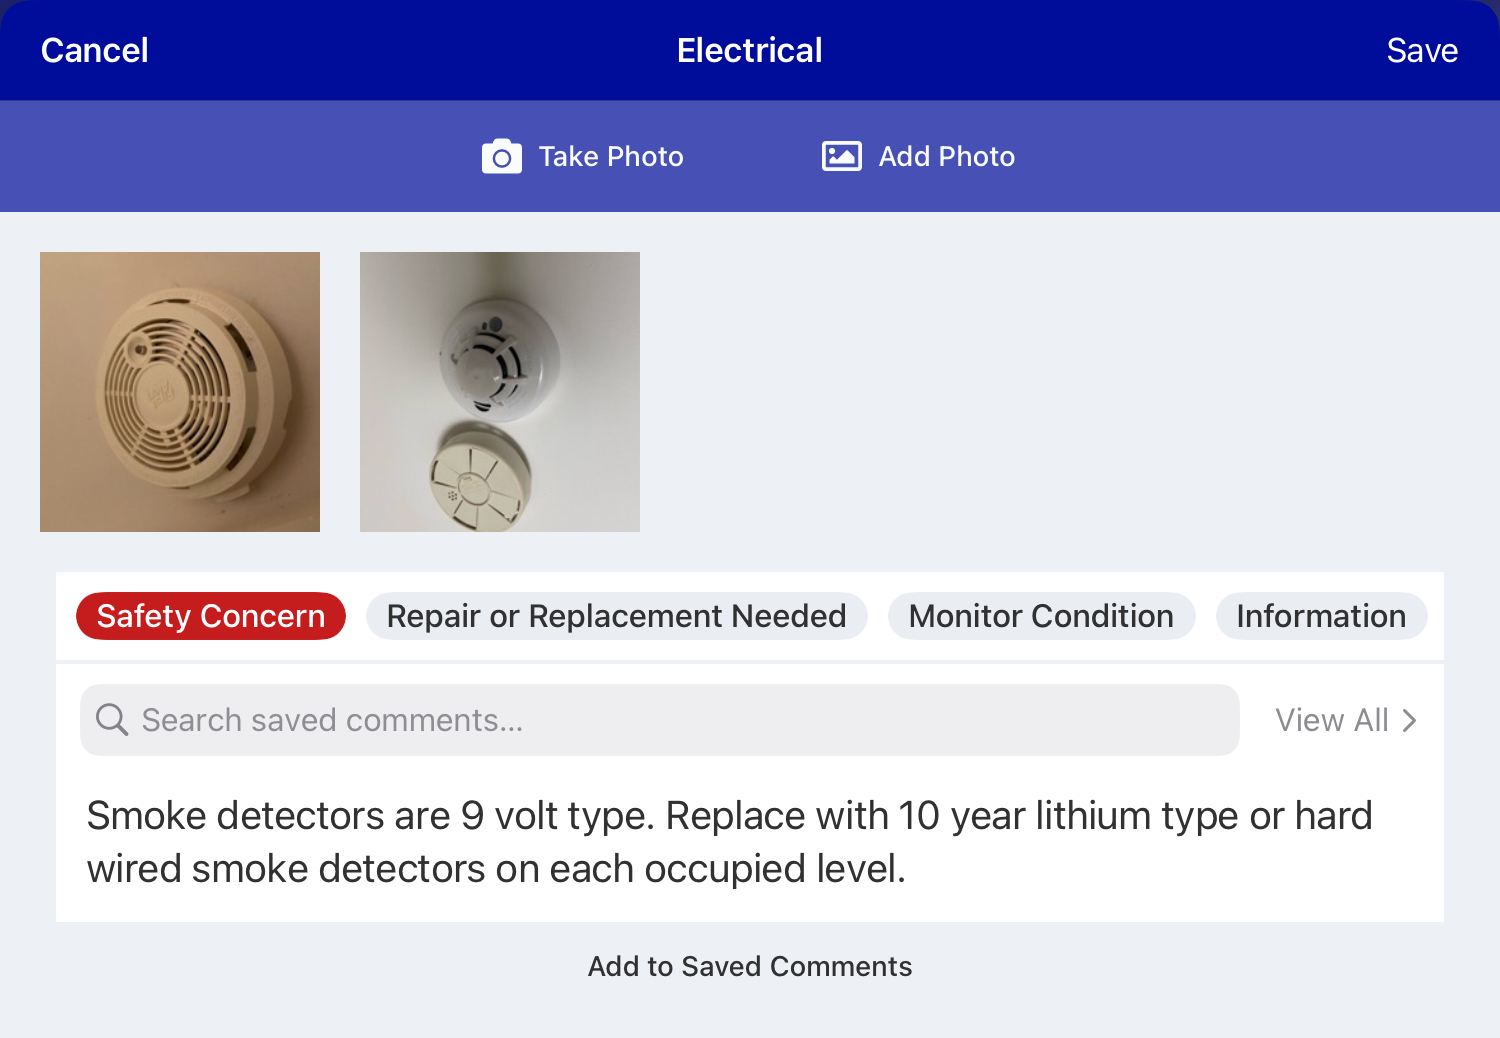
Add a new comment by tapping Add Comment in the area you want the comment recorded and displayed in your final report this can be in a section like exterior or in an item like exterior covering.
As a best practice, each comment should include the following parts.
- What you observed
- Why it is important
- What you recommend to do next
- A photo or two to help clarify your statements
Following this best practice will make sure each comment can stand on its own and tell a full story to the reader.
Comments can not be hidden like sections and items but they can be deleted if they are not needed. Keep in mind that deleting a comment deletes the text and the photos in the comment. Just like when deleting a section or items, a deleted comment can not be undeleted. It is gone forever so be careful.
Photos Document What You See
Photos are a fundamental part of any modern home inspection report. Photos in Tap Inspect are quick and easy to add, manage, and markup while you are inspecting. This saves you an hour or more after the inspection compared to adding all the photos after the inspection has been done.
Photos can be added to a report in two ways. You can take photos with the camera directly inside the Tap Inspect app or you can add previosly taken photos from from the Photos library on your device.
Photo Collections
A photo collection is a group of photos that can include a single photo or multiple photos. The photo collection could be part of a comment, the photos of a photo items, or they could be the item photos of a multiple choice item.
You can always add more photos to a collection, rearrange the order of the photos, or delete a single photo from the collection and the report.
The Demo Dan has several photos so you can see how the look and behave in your reports. Tap General and you can see the photo collection of the Overview Photos Of Property item.
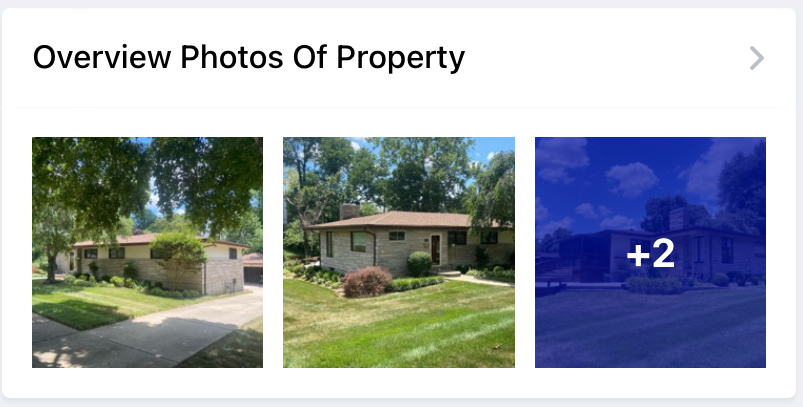
Tap on any photo to open it full size in the photo viewer. The photo viewer lets you delete the photo from your report, edit the photo with markups like arrows, circles, or text, and share the photo by saving it to your device, texting it, or emailing it.
Next Steps
Now that the inspection is done and all the observations have been recorded we can move on to the last step of the job. Step 4: Review and Share Your Results
Comments
0 comments
Please sign in to leave a comment.